|
Sock Monkey Rag Quilt
Finished Quilt Size 42" x 54" |
My son is a huge fan of the vintage Sock Monkey. For his 8th birthday I decided to make him a rag quilt using the "5 Funky Monkey" flannel line by Erin Michaels for Moda Fabric. The first "quilt" I made was a rag quilt. They are so quick and easy. They are perfect for a novice. And it's made of flannel which gets softer and softer every time you wash it. Plus, there are so many great flannels on the market today. These make perfect gifts for anyone. I used six different prints in this quilt. I also used Warm and Natural Batting.
The prints I selected were:
 |
5 Funky Monkeys Flannel
By Erin Michaels
For Moda Fabric |
- Flannel 5 Funky Monkeys Cream Sock Monkey
- Flannel 5 Funky Monkeys Blue Sock Monkey
- Flannel 5 Funky Monkeys Brown Bananas
- Flannel 5 Funky Monkeys Yellow Dots
- Flannel 5 Funky Monkeys Red Sock Texture
- Flannel 5 Funky Monkeys Brown Sock Texture
The first step in creating this rag quilt is to cut the pieces. I chose to make my finished squares 6" so the cut square was 7". I wanted nine rows of seven squares. This made a throw size blanket. If you want a larger (or smaller) quilt you simply add (or subtract) rows until you have the quilt size you want.
Fabric Requirements
As for how much fabric you will need to complete this project, it will vary depending on the size of quilt you want and how many patterns of fabric you are using. How much fabric you need will depend on how many squares you can cut per row. For this quilt you will need 126 squares of fabric. Using flannel that comes on a 44" bolt, I was able to cut 7 squares per row.
Figure how many seven inch squares would fit in a row, and how many rows you need to equal the total number of squares.
So, using this math and a 44" bolt of fabric, I needed 22 7-inch square of each of my six fabrics. I was able to cut 7 squares per row. I had to cut four 7" rows from each fabric. 4 x 7 = 28. I needed 28" of each fabric. DO NOT purchase 28" of fabric--one wash or one wrong cut and you are not going to have enough. If you need 28" round up to 7/8 of a yard. This will give you 31.5" which will allow for fabric shrinking and crooked cutting.
This number will vary depending on the number of fabric patterns you are using. It may be helpful to draw out your quilt and decide how many squares you need of each pattern before you begin. If you need more help the ladies at the fabric store are very knowledgable.
Pre-Wash your Fabric
The debate goes on "Pre-wash or not." I say pre-wash. This quilt has to be washed in its final step. Even if you are not worried about your fabric shrinking remember your fabrics may bleed. There is nothing worse than spending days on a project only to pull it out of dryer with hot pink fading onto your pale yellows. (ask me how I know this) It will only take a few more hours to wash your fabrics. I always put them on the quick wash cycle and pour a cup of white vinegar in the rinse cycle. This helps set the color. Dry your fabric as normal. If your flannel comes out very wrinkled, iron before cutting.
Step 1: Cutting the Fabric
The first step is to cut the fabric and the batting.
Items that I used:
- Rotary Cutting Mat
- Rotary Cutter
- Ruler
You can cut your fabric with regular scissors but a rotary cutter makes it a lot easier.
You will need 63 finished 7-inch squares. So you will need to cut 126 7-inch squares from your chosen fabric. I had six patterns so I wanted to have 11 finished squares from each pattern.
Fold your fabric selvage to selvage (finished side), wrong sides together. Make sure the fabric is wrinkle free and smooth. Lay the selvage along the side of the mat and line the fold up so that it is straight. Using the grid on the mat, and your ruler cut the selvage off so the fabric is square. (There are great tutorials online for cutting with a rotary mat if you need more help) IF your fabric starts at zero line your ruler up with the 7-inch mark on your mat and cut a straight line. This will give you a 7-inch strip of fabric. Line the remaining fabric up at the zero, making sure it is straight and cut another 7-inch row. Continue this until you have the amount of rows needed.

Cut 63 7-inch squares. Take one of your newly cut rows of fabric and line it up horizontally with the straight edge of your mat. You may need to cut the open ends (opposite from the folded side) to square them up with the straight edge of the mat. Cut 7-inch squares. You should be able to double cut three giving you six squares. Then open the folded side and cut one additional square from the remainder of the fabric.
My fabrics were 44/45" so I cut three strips seven inches wide. Then I cut seven 7" squares from each strip (six while the fabric was doubled then one from what was left over). I needed twenty two 7" squares from each fabric to make 11 quilt sandwich squares. So I had to cut one additional 7" square from my leftover fabric.
This will give you 126 squares.
You will also need 63 squares of batting. One square of batting will go between two squares of fabric.
The batting needs to be 1 1/2" smaller than the original square to allow for 1/2" seam allowance. Cut 63 5 1/2" squares of batting. Cut the same way. Batting comes on march larger bolts so you will be able to cut more squares from each 5 1/2" row.
Step 2: Making the Quilt Sandwich
Lay one square of fabric right side down then center batting on top of it. Lay another square of fabric on top, right side up. You will end up with two squares of fabric, right sides facing out with a piece of batting in between, thus the name: Quilt Sandwich. Sew an "X" across the quilt sandwich corner to corner.
I like to save time by sewing all the squares in one direction, cutting them then sewing all the squares in the other direction. This saves you a little time but it is not at all necessary.
Step 3: Laying Out the Quilt
You probably have a general idea of what you want your finished quilt to look like. Now that you have all your quilt sandwiches assembled it is time to lay out your quilt. If it is a larger quilt you will want to do this on an open area on your floor. A smaller one might fit on your kitchen table, like mine did.
I chose to line mine up in diagonal rows, but you choose any pattern you like, or no pattern at all. After you lay the pieces out you can move them around to get it just like you like it. Then I highly recommend taking a picture of the layout. You can also pin the rows together. I don't pin the rows together because I take the pieces straight off of this table and sew them together. Then I bring them back and lay them out again to make sure that they are right. This makes the process a little longer but I make less mistakes this way. The project gets really long if you have to rip out seams over and over.
I use a 1/2' seam allowance. If you use less you won't have enough seam to snip--and your rag quilt won't have any rag to it. I use a piece of ruler tape to mark the 1/2" on my sewing machine because I'm so used to 1/4" seam allowance that I can easily mess up.
Unlike traditional quilting the seam is going to show on this quilt. Sew the raw seam toward the top of the quilt. Put two squares together (back to back) and sew a 1/2" seam. According to your pattern continue to add until you have a row consisting of 7 blocks. Assemble each row until you have nine rows of seven blocks each. At this point your quilt should look like this:
 |
| All the seams should be on the same side of the quilt and facing the same direction. |
Assembling the Quilt
Once you have your rows of seven sewn together it is time to assemble the rows to one another. This will require pinning. Take two strips of your seven blocks and pin them back to back. This means flat sides with no raw seams should be facing each other.
You will be sewing a long 1/2" seam so pin a little lower down than 1/2" making sure that the edges line up. Line each square up making sure the seams match. I pin the seam at the seam allowance to make sure one seam is facing right and the other is facing the left. This will make it easier to sew and not bunch up at the seams. After you clip and fray the edges it won't matter. After pinning the row open it up and make sure you have pinned it correctly. DO THIS EVERY TIME! It is very easy to get disoriented making this quilt.
When you are sure it is pinned correctly fold the rows back on themselves and sew them together at the pinned edge leaving 1/2" seam.
Continue to sew a new strip along the long side until you have put together all nine rows. I recommend laying the quilt flat between each row to make sure that everything is facing the right direction. It is easier to rip one seam than two or more.
When you are finished sew along the outside of the entire quilt with 1/2" seam allowance.
 |
The assembled quilt. Each square should have four raw seam edges showing.
|
Fraying your Rag Quilt
 |
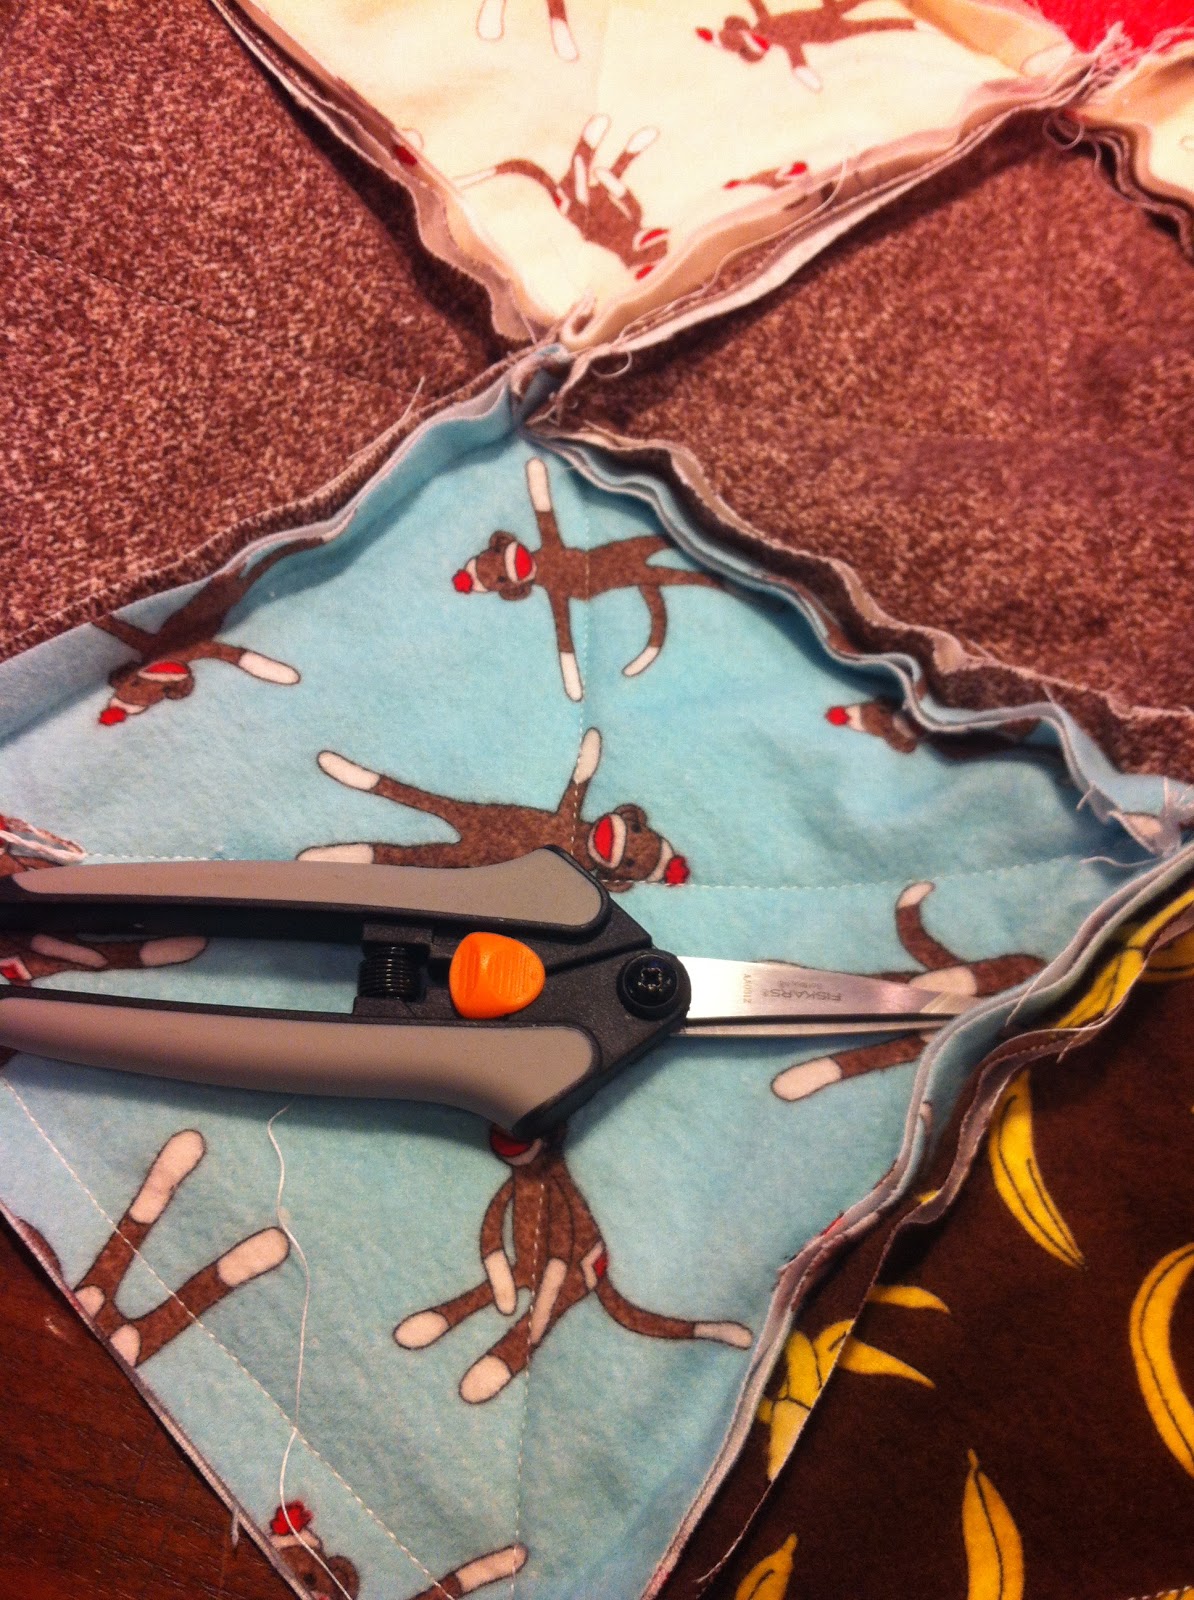
Fiskars spring loaded
Rag Quilt Snips |
Once your rag quilt has been assembled you will "snip" the raw seam edge at regular intervals. I put the quilt on my kitchen island so I don't have to bend over it, but you could also lay it out on the floor. I have also just put it on my lap and turned on a movie. Whatever works for you. This is a tedious process and takes a while. Take breaks as needed. Your hands will thank you for it.
There actually are "scissors" designed specifically for this. They are rag quilt snips. The first quilt I made using scissors. They did the job but these snips make it a lot easier.
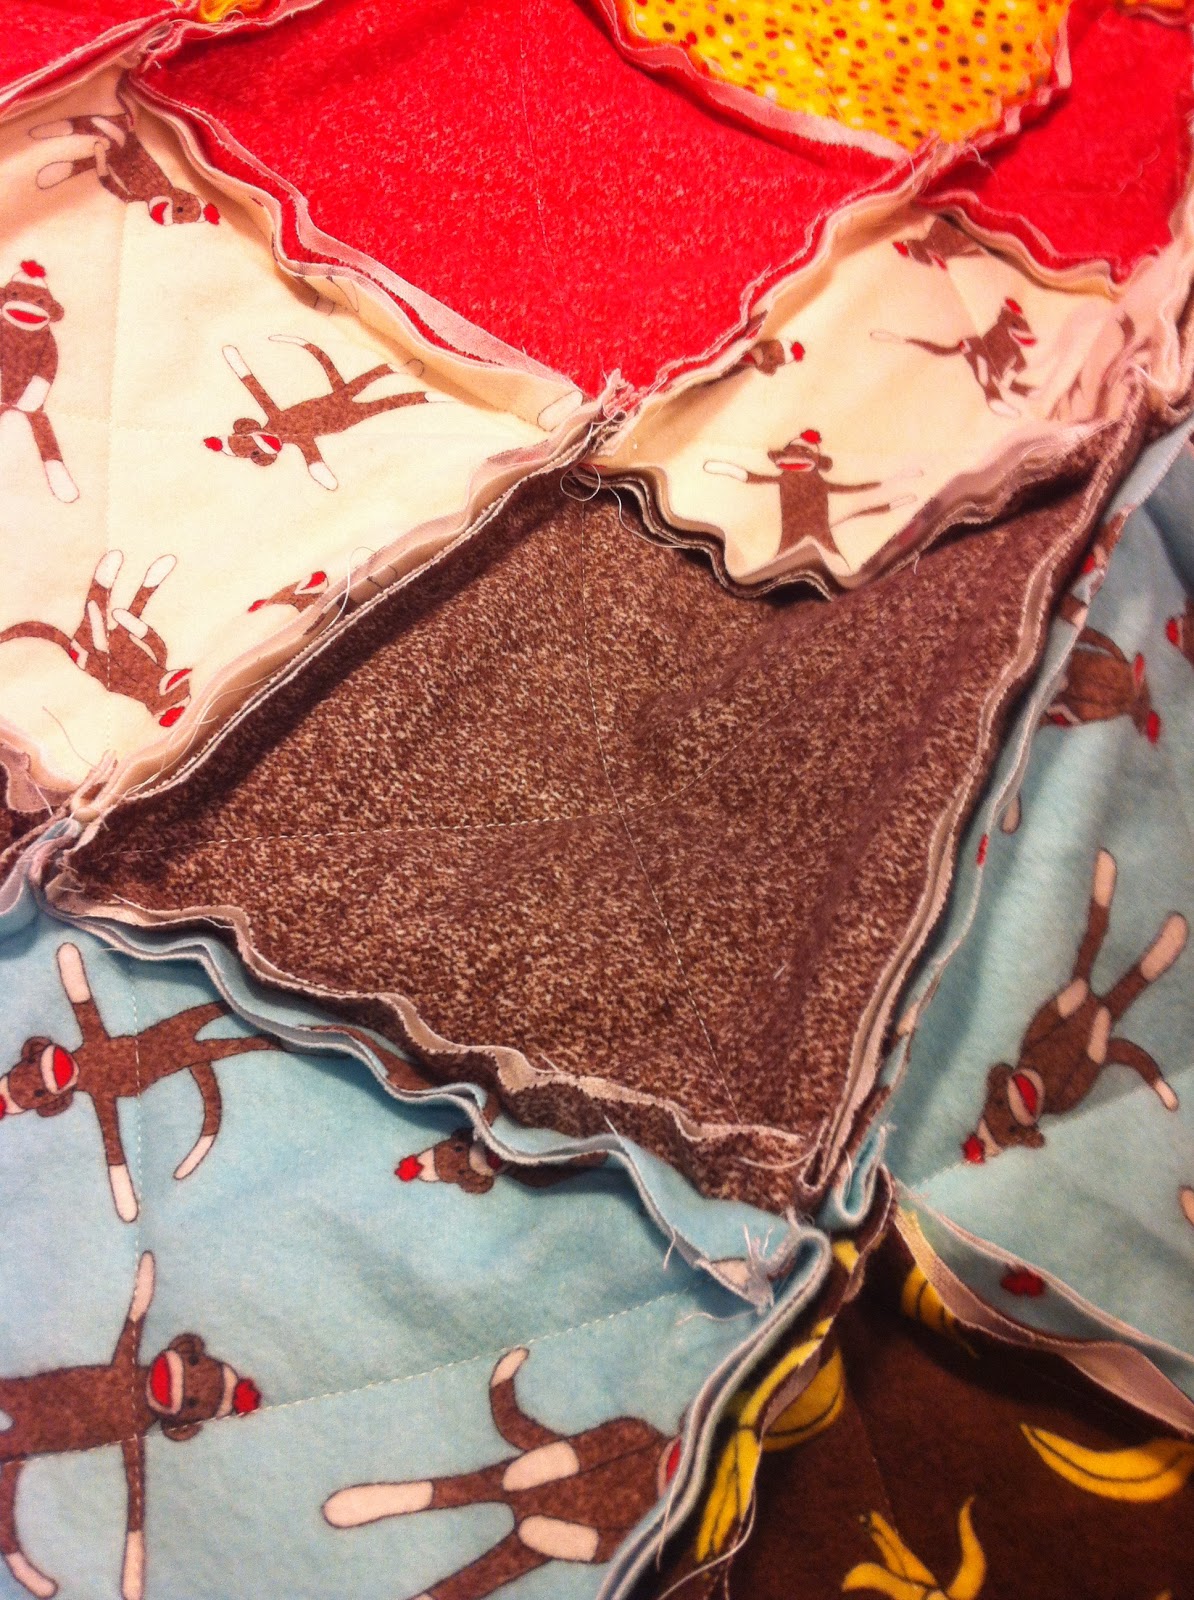
Now start snipping. Snip all the raw seams at about 1/4" intervals. The cut is perpendicular to the stitching. Do not snip into the seams. Don't forget the seam around the edge of your quilt. It will need to be snipped as well.
This is a maddening process, once you are finished your hand will ache and you will be covered with flannel "dust." But it yields a great reward.
The front of your quilt will be frayed, but the backside should be smooth.
Washing Your Rag Quilt

You may choose to take your quilt to a laundromat for this because it produces a lot of lint. I have always washed and dried my rag quilts in my front load washer and dryer right here at home with no problems.
Machine wash your quilt on cold. Make sure you wipe the lint out of the washing machine afterwards. Dry your quilt. Start with a clean lint trap and make sure you clean it out afterwards. After drying take your quilt out and shake it.
The more you wash and dry this quilt the softer and more fluffy it becomes.
All done.
Enjoy your quilt.